
Pages
Ticket fields
Managing ticket fields
Overview
Ticket Fields let you customize the information collected on every ticket in your organization. You can reorder existing fields, add new custom fields, or remove ones you no longer need.
To access Ticket Fields, go to Settings → Ticket Fields.
Default fields
Every organization starts with three default fields that cannot be removed: Ticket Type, Priority, and Status.

These fields are marked as Default and will always appear on tickets.
Adding a custom field
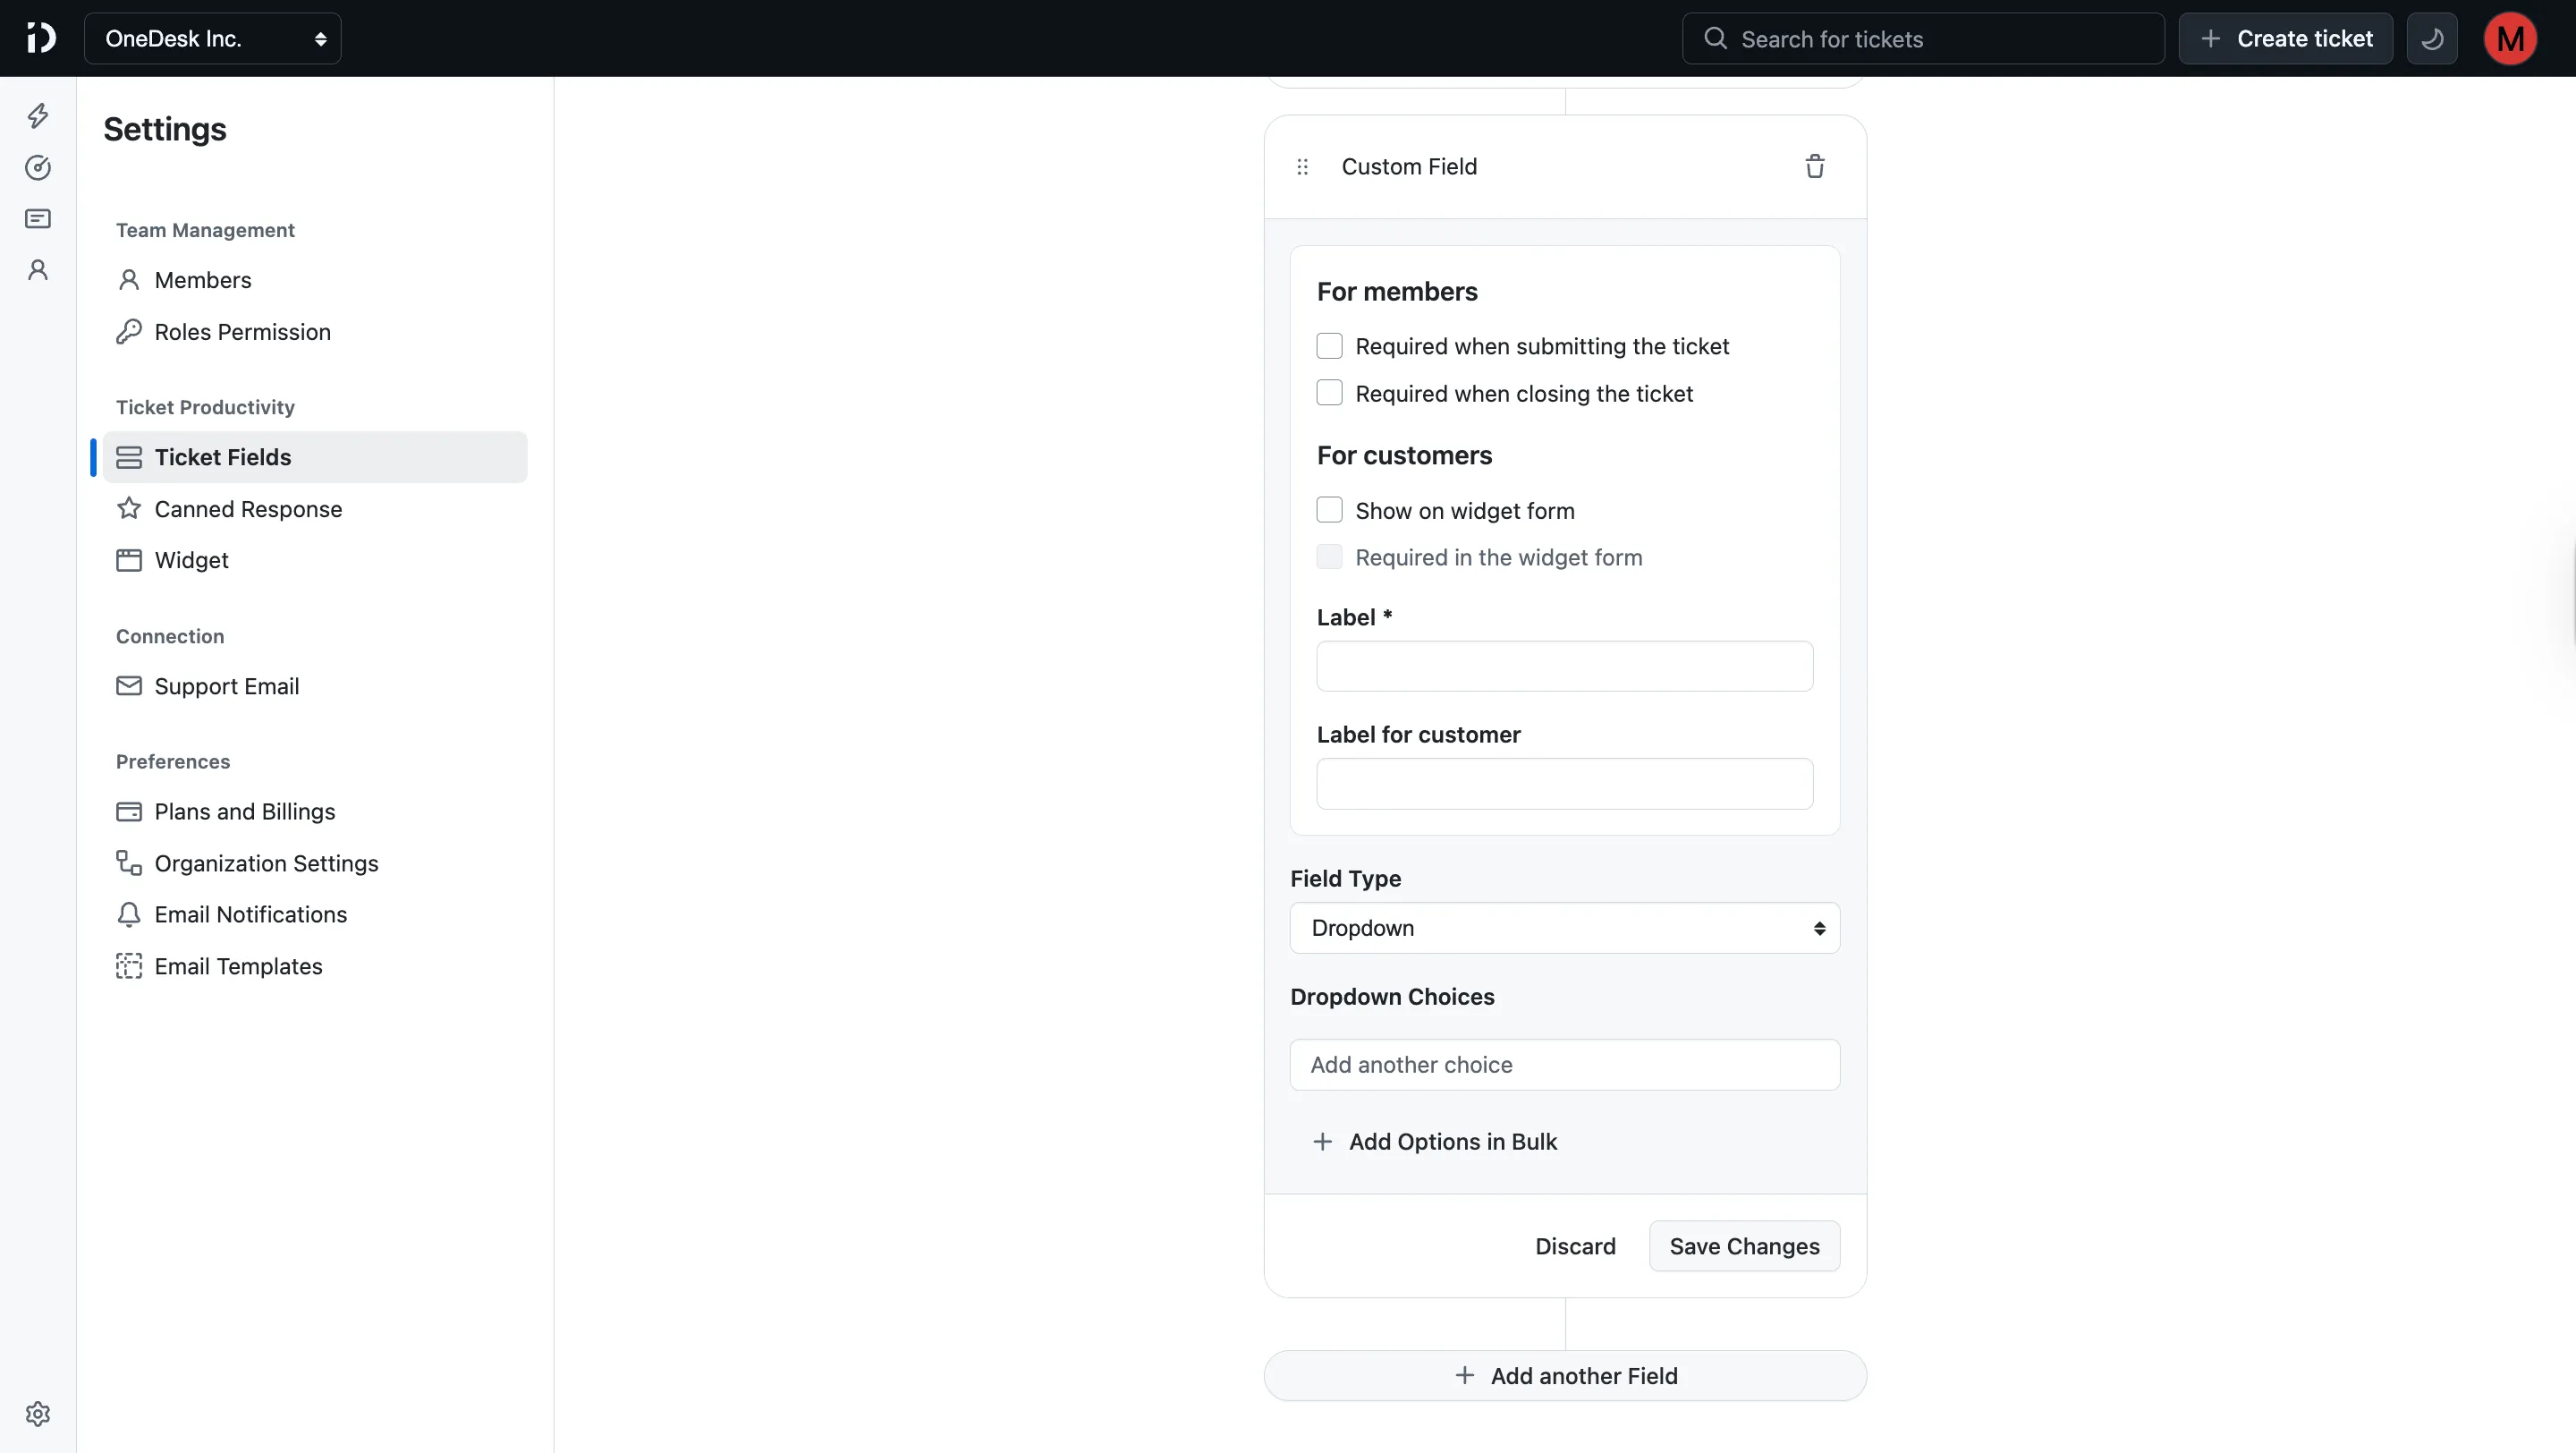
To add a new field, click + Add another Field at the bottom of the fields list. A configuration panel will expand inline with the following options.
For members
Control how agents and team members interact with the field:
- Required when submitting the ticket — Members must fill in this field before they can submit a ticket.
- Required when closing the ticket — Members must fill in this field before they can mark a ticket as closed.
For customers
Control how the field appears to end users submitting tickets via the widget:
- Show on widget form — Makes the field visible to customers on the support widget form.
- Required in the widget form — Customers must fill in this field before they can submit a ticket. (Only available when “Show on widget form” is enabled.)
Labels
- Label (required) — The internal name for the field, shown to your team members.
- Label for customer — An optional, customer-facing label shown on the widget form. Use this if you want a different, friendlier label for end users.
Field type
Choose how the custom field should collect input:
- Text — Single-line input.
- Textarea — Multi-line input.
- Dropdown — A selectable list of options.
Dropdown choices
When Field Type is set to Dropdown, use the Dropdown Choices section to define the available options:
- Type each choice into the Add another choice input and press Enter to add it.
- To add many options at once, click + Add Options in Bulk and paste a list of values.
Saving or discarding
Once you’ve configured the field, click Save Changes to apply it, or Discard to cancel without saving.
Reordering fields
Drag any field using the handle (⠿) on its left side to reorder it. The order set here determines the order fields appear on tickets.
Removing a custom field
Click the trash icon on a custom field to delete it. Default fields (Ticket Type, Priority, Status) cannot be removed.
Table of Contents
On this page