
Pages
Setup Organization
Configure your organization settings, invite team members, and manage roles.
Create Organization
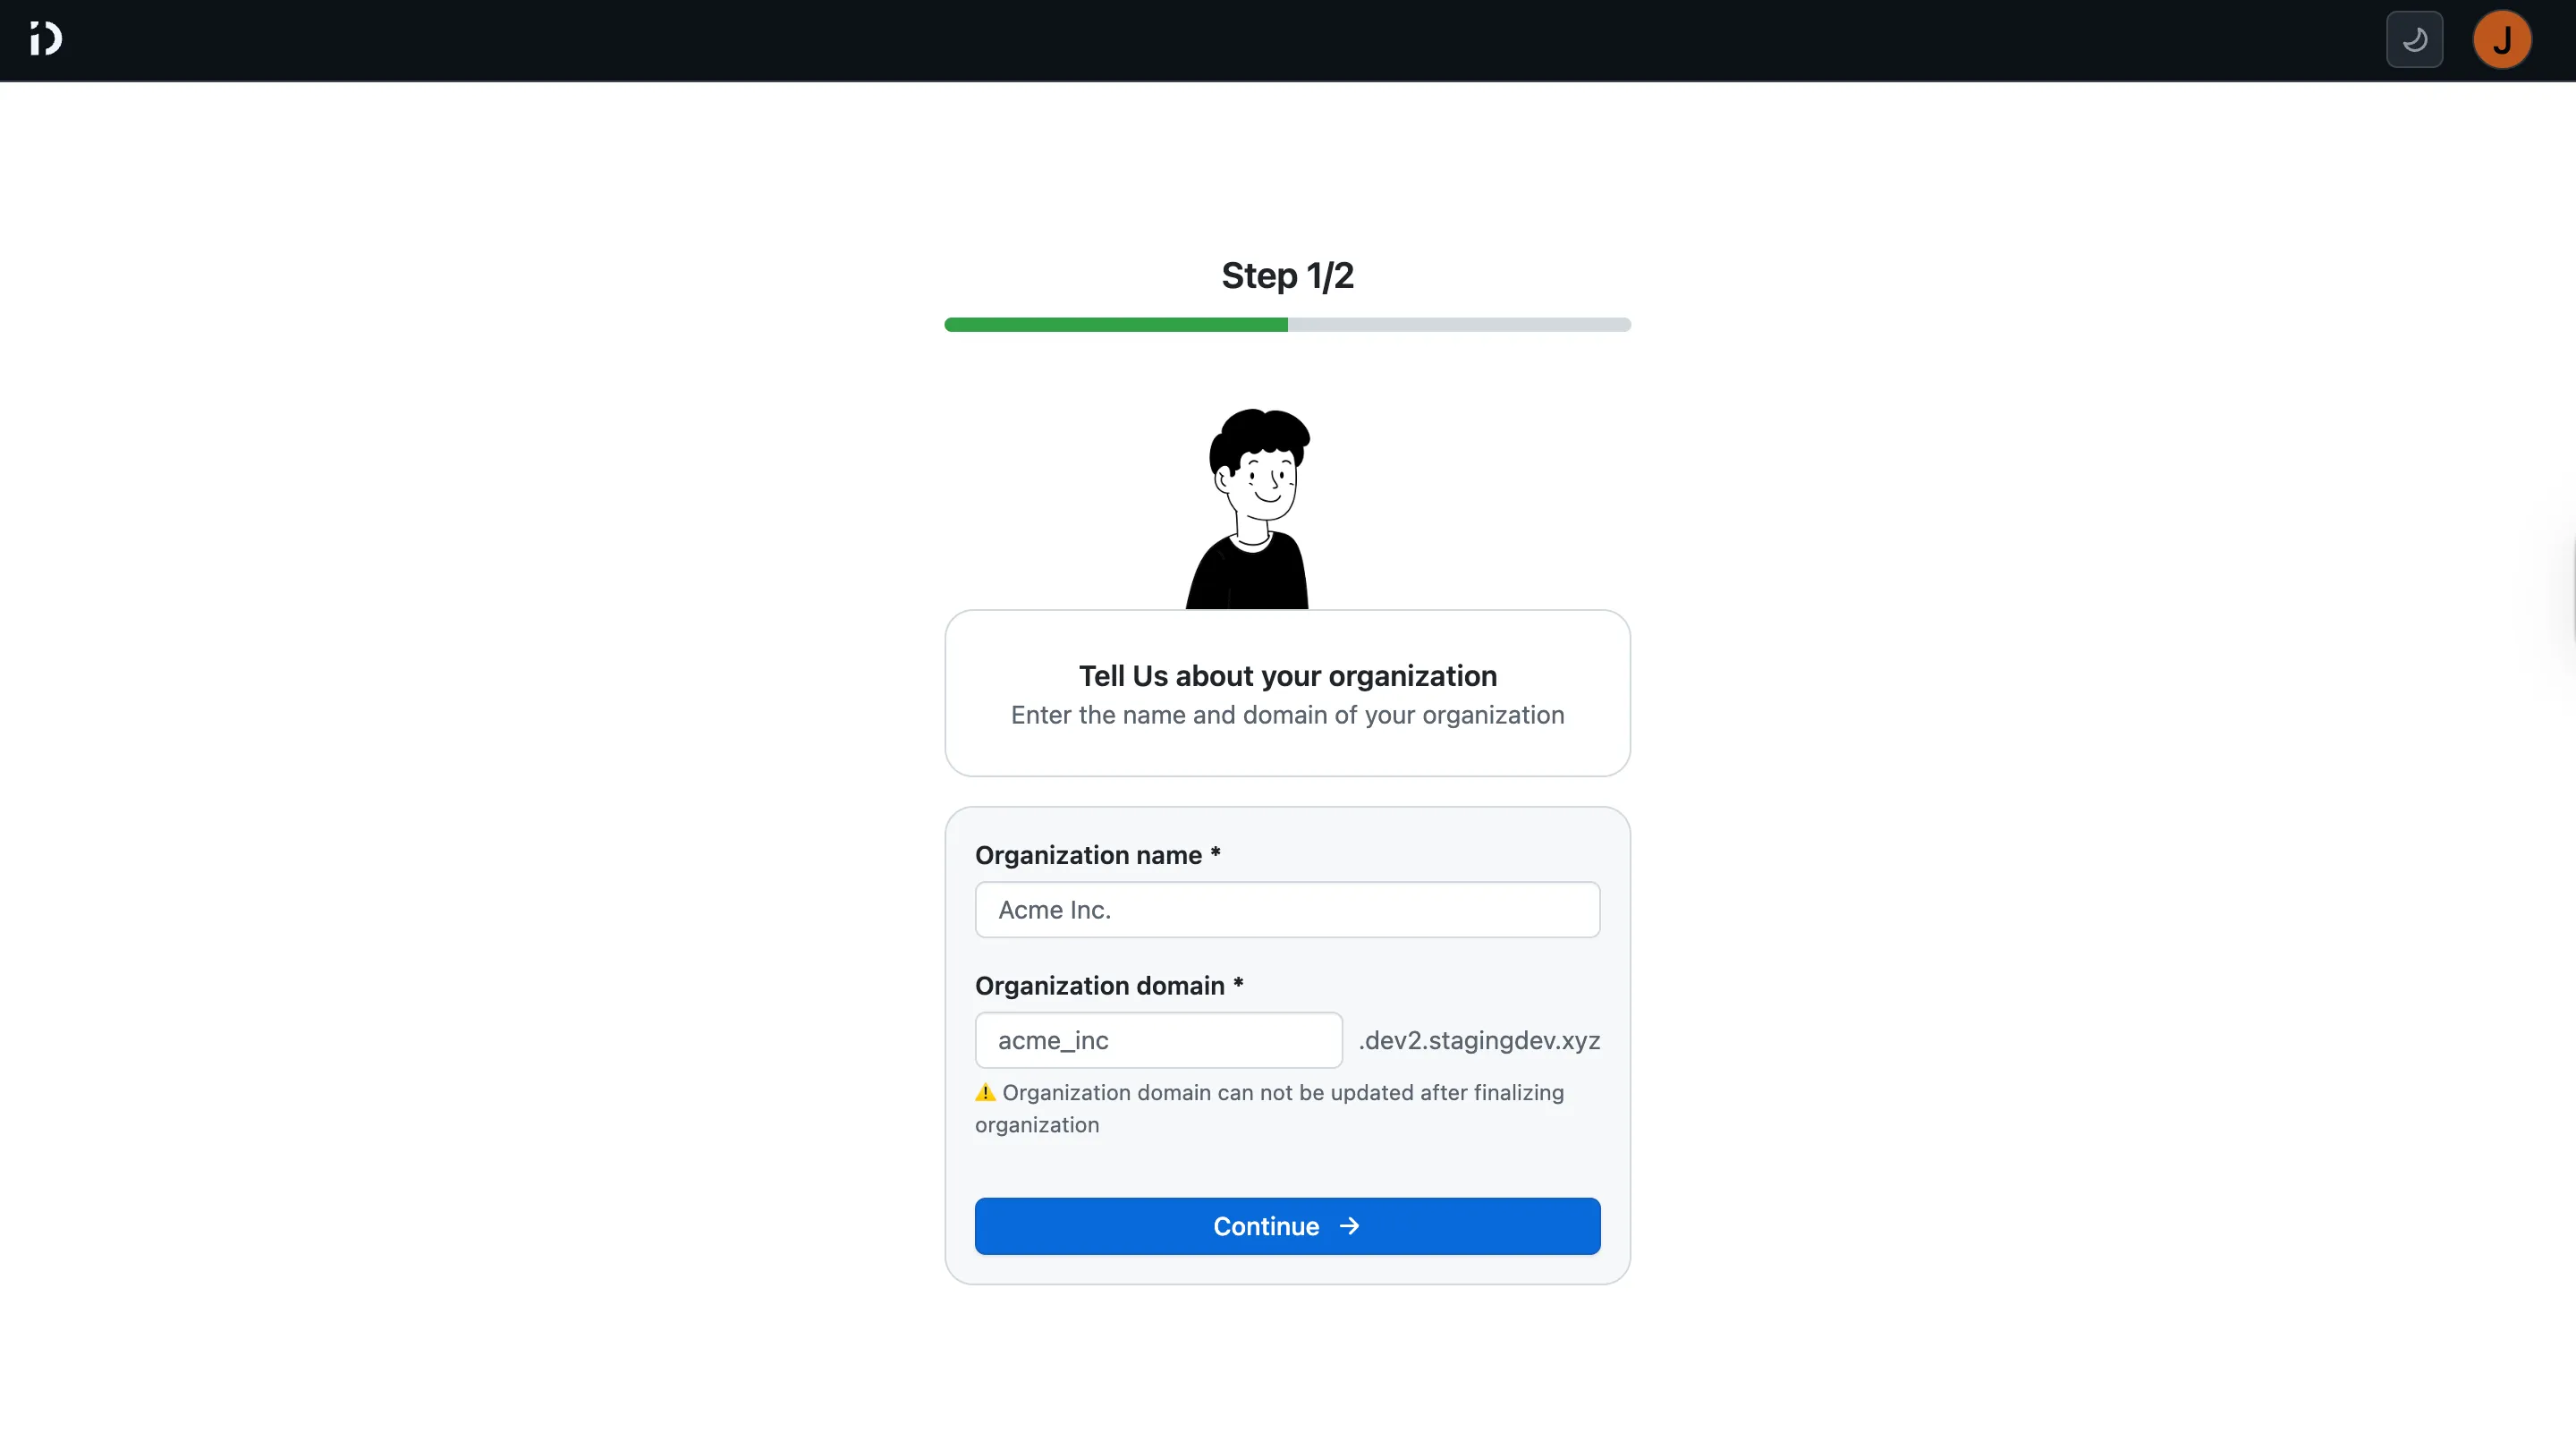
To create an organization, click on the “Add New Organization” button on the dashboard. Fill in the required information, such as your organization name and domain name. You can also add a custom email from name and default email address for your organization. Once you have filled in the details, click on the “Create Organization” button to complete the process.
Step 1: Click on “Add New Organization” button.

Step 2: Enter your organization details.
Step 3: Enter your Email from name and default email address.
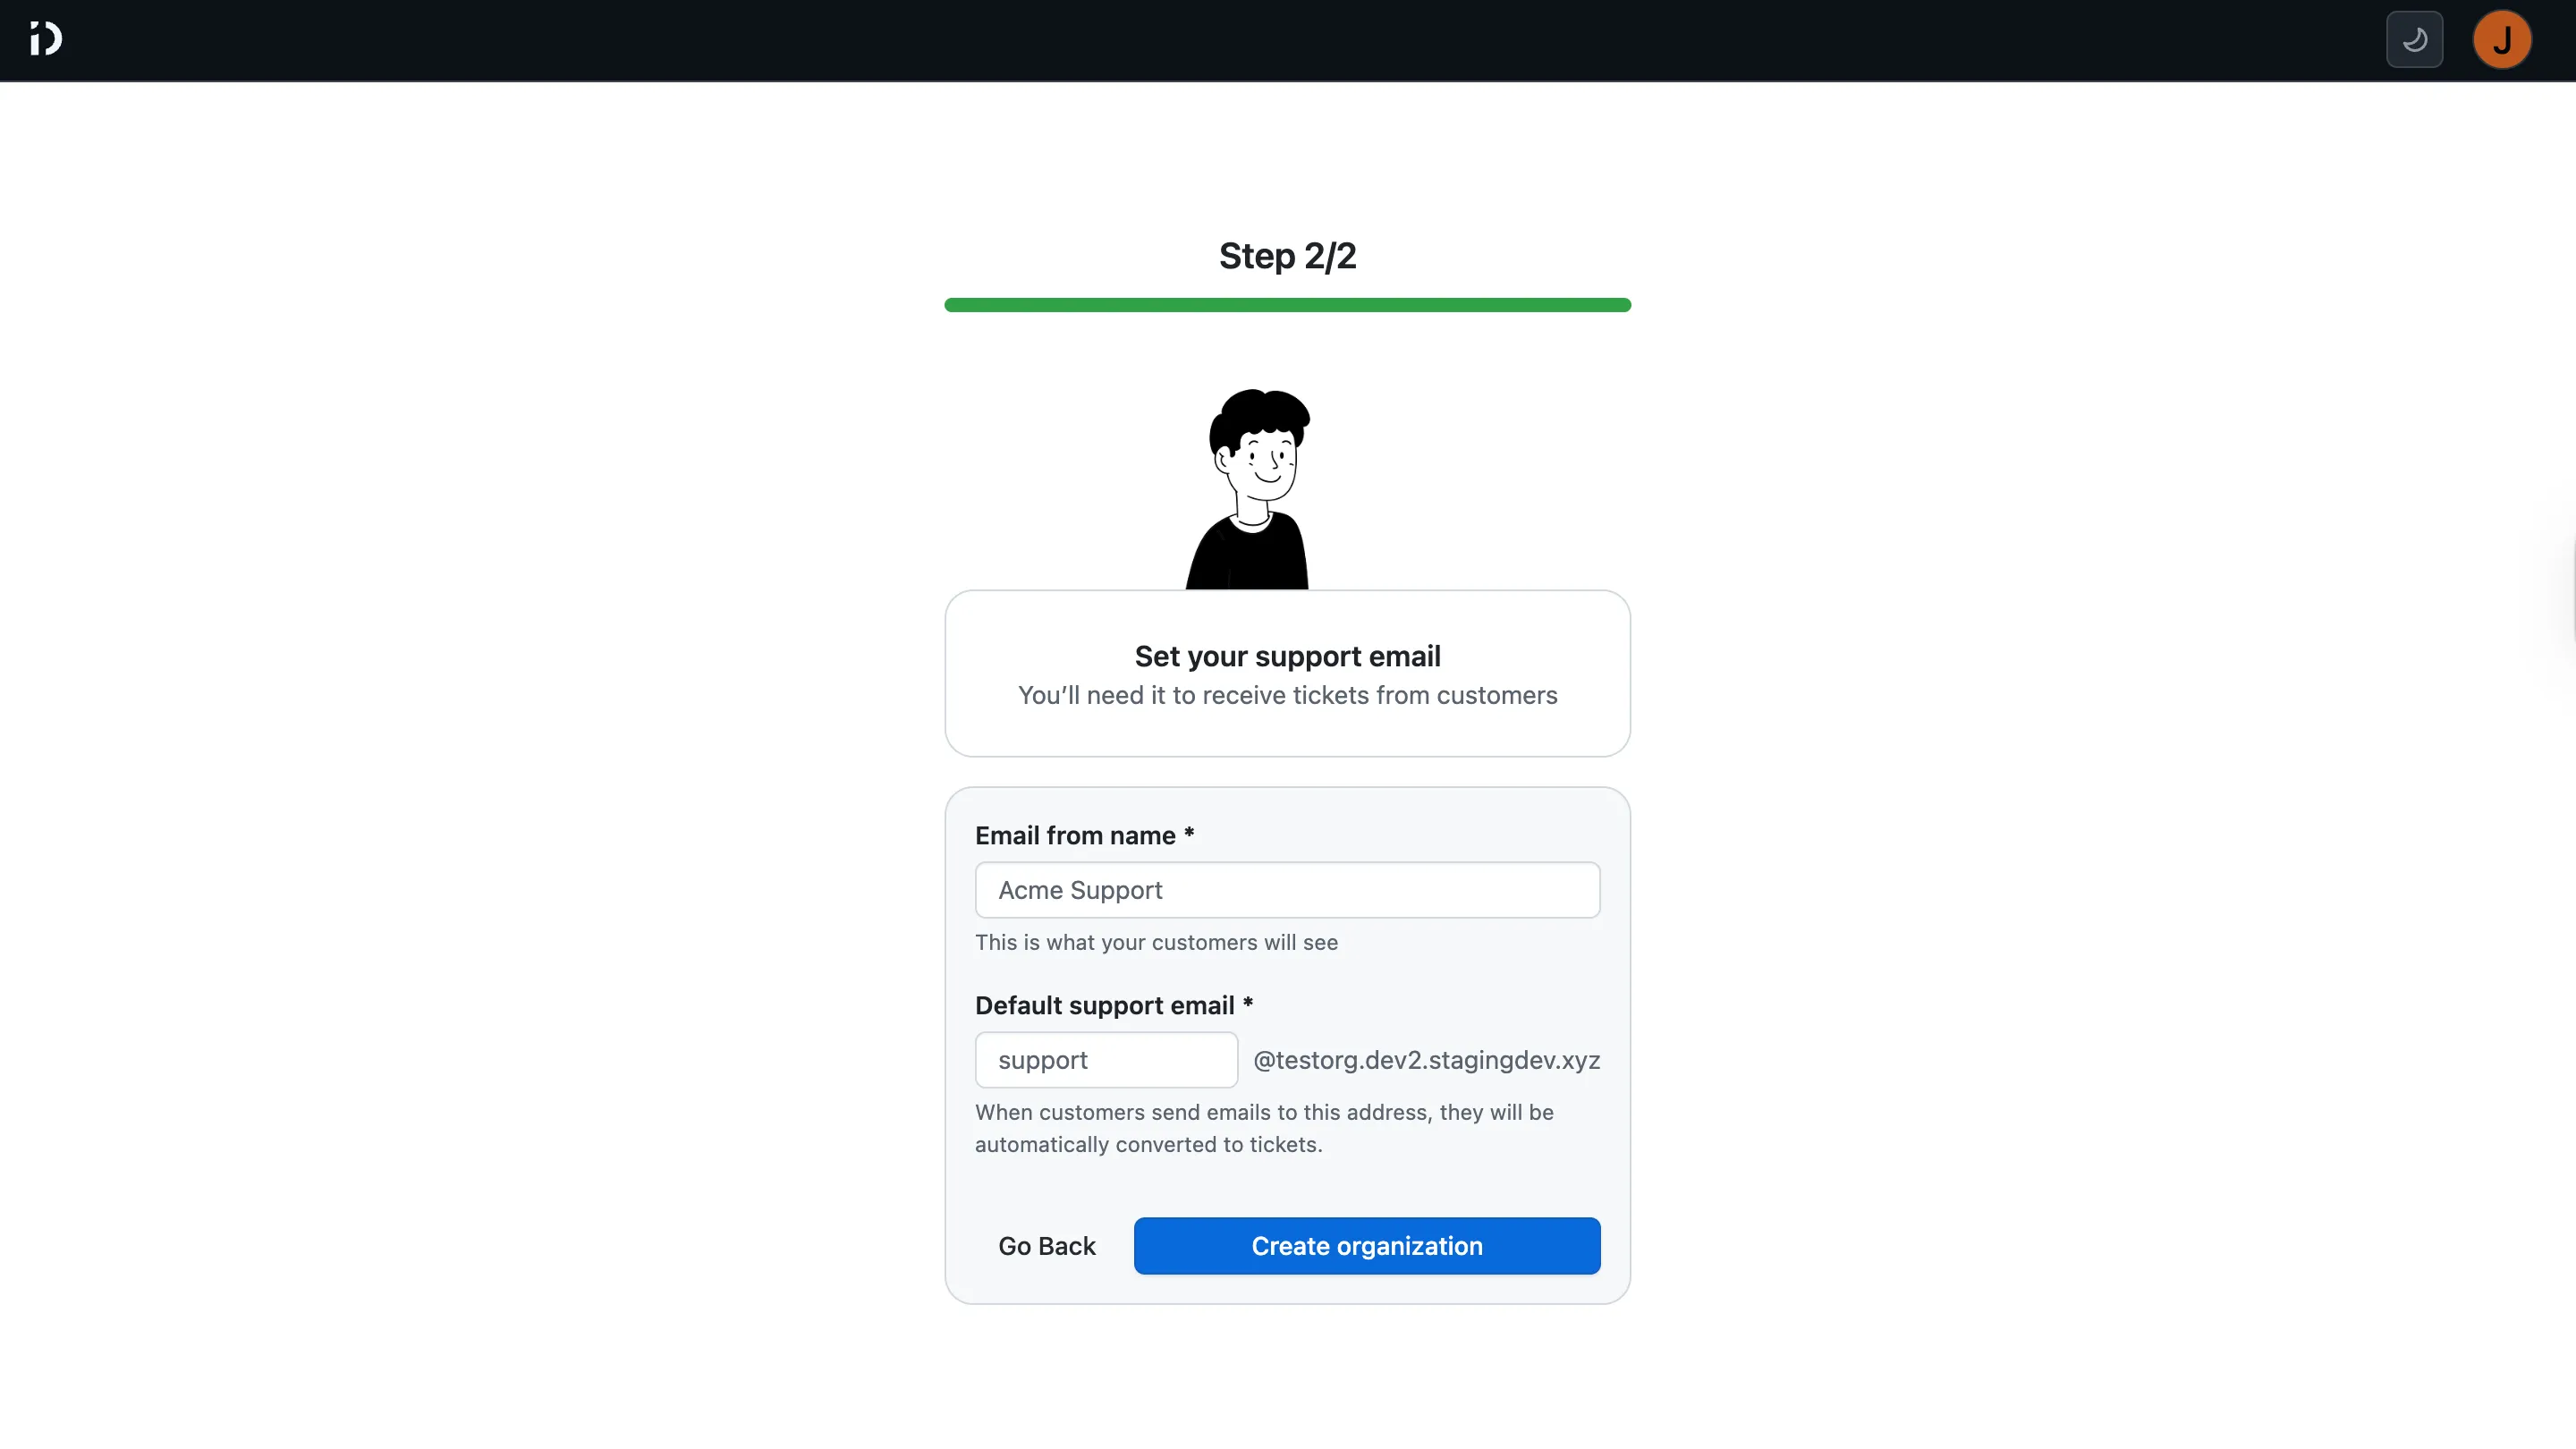
Step 4: Click on “Create Organization” button. Your organization will be created, and you will be redirected to the organization list page.
Organization Settings
Check out the organization settings to manage your organization’s details, invite team members, and configure roles and permissions.
Invite Team Members
You can invite team members to join your organization by navigating to the “Members” section in the organization settings.
Manage Roles and Permissions
Assign roles to your team members to control their access and permissions within the organization. You can create custom roles with specific permissions or use predefined roles such as Admin, Ticket Collaborator, and Viewer.
Add ticket fields
Customize your ticketing system by adding custom fields to capture specific information relevant to your organization’s workflow. You can create various types of fields, such as text, dropdowns, checkboxes, and more.
Add Canned Responses
Save time and improve response consistency by creating canned responses for common inquiries. Canned responses can be used to quickly reply to frequently asked questions or provide standard information to users.
Setup your widget
Configure your support widget to provide a seamless customer support experience. Customize the appearance of the widget to match your brand, and set up automated responses to common questions. You can also enable features like live chat, ticket submission, and knowledge base access directly from the widget.
Configure your support email
Set up your support email to ensure that all customer inquiries are directed to the right place. You can configure your support email address and set up forwarding rules. This allows you to efficiently handle customer support requests and maintain organized communication channels.
Upgrade your plan
Upgrade your plan to access additional features and capabilities. Explore the different pricing tiers and choose the one that best fits your organization’s needs. Upgrading your plan can provide you with enhanced functionality, increased storage, and priority support.
Set your email preferences
Configure your email preferences to manage how you receive notifications and updates from the platform. You can choose to receive email notifications for specific events, such as new tickets, ticket updates, or team member activities. Adjusting your email preferences helps you stay informed while avoiding unnecessary emails.
Table of Contents
On this page