
Pages
Roles Permission
Managing roles and permissions
Overview
Roles let you control what each member of your organization can see and do. Every member is assigned a role, and each role has a specific set of permissions across different areas of the platform.
To access Roles, go to Settings → Roles Permission.
Default roles
Your organization comes with five built-in roles:
| Role | Description |
|---|---|
| Organization Owner | Full access to the organization. Assigned to the account that created the organization. |
| Administrator | Administrative access to the organization. |
| Supervisor | Supervisory access across teams and tickets. |
| Agent | Standard support agent access. |
| Ticket Collaborator | Limited access for collaborating on tickets without full agent capabilities. |
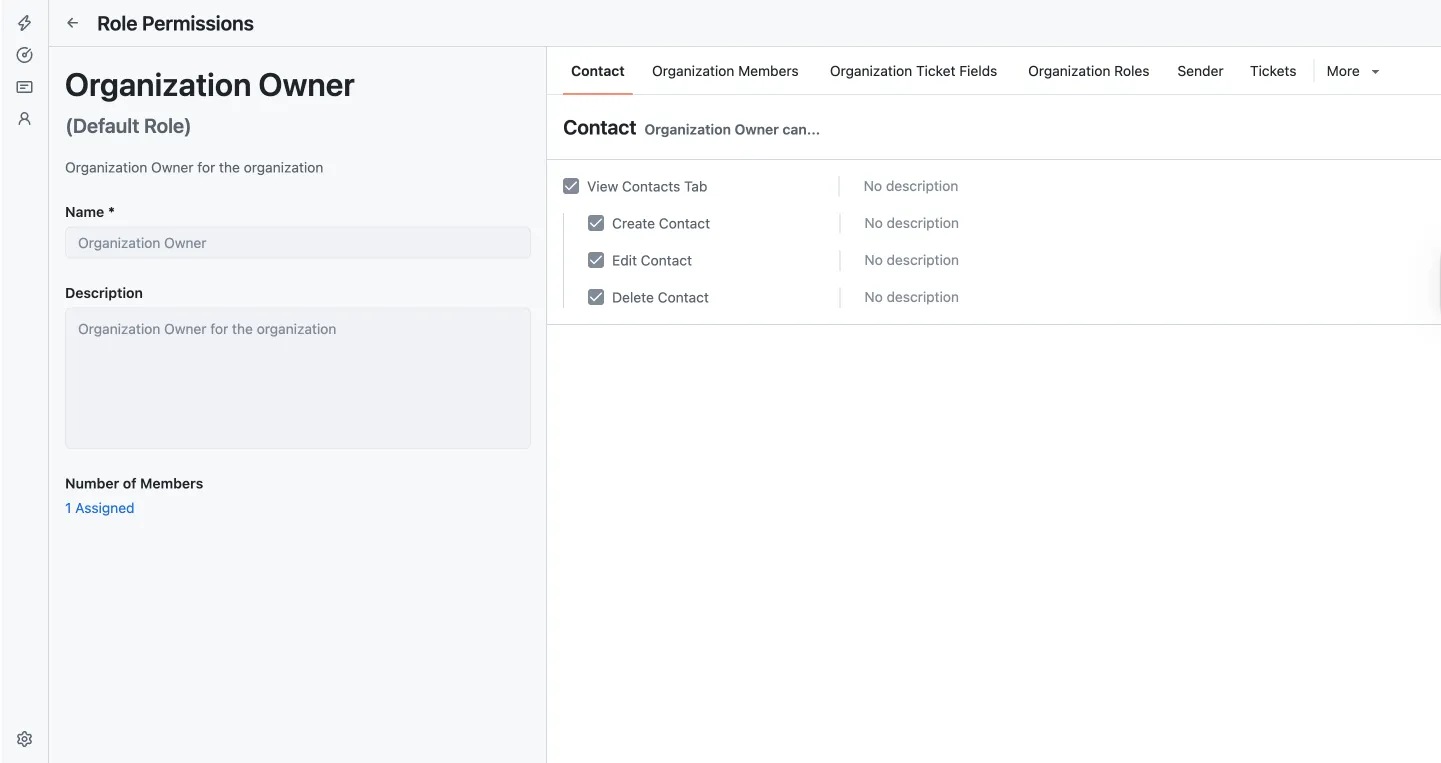
Each role displays how many members are currently assigned to it.

Permission categories
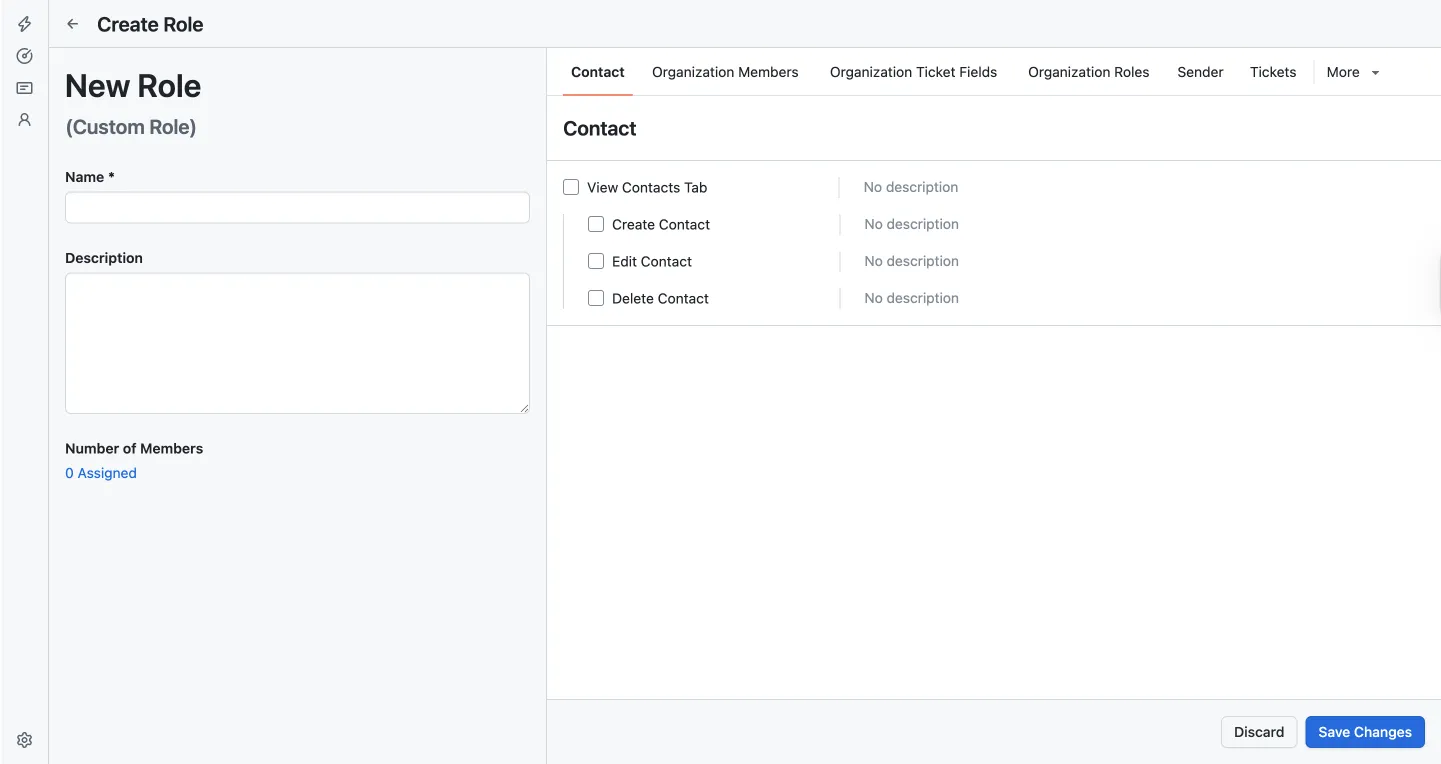
When viewing or editing a role, permissions are organized into tabs across the top:
| Permission | Description |
|---|---|
| Contact | Access to the Contacts tab, and the ability to create, edit, or delete contacts. |
| Organization Members | Manage who is part of the organization. |
| Organization Ticket Fields | View and manage custom ticket fields. |
| Organization Roles | Manage roles and their permissions. |
| Sender | Access to sender/inbox configuration. |
| Tickets | Ticket-related actions and visibility. |
| More | Additional permission categories. |
Within each tab, you can toggle individual permissions on or off for that role.
Creating a custom role
To create a new role, click + Add New on the Roles page. You’ll be taken to the Create Role screen where you can:
- Enter a Name for the role (required).
- Add an optional Description to explain the role’s purpose.
- Configure permissions across each category tab.
- Click Save Changes to create the role, or Discard to cancel.
New custom roles start with all permissions unchecked. Enable only the permissions appropriate for that role.
Editing an existing role
Click any role from the list to open its Role Permissions page. From here you can:
- Update the role’s Name and Description.
- Toggle permissions on or off across each category tab.
- See the Number of Members currently assigned to this role.
Changes are saved immediately when you update permissions on an existing role.
Assigning roles to members
Roles are assigned to members from Settings → Members. Each member can have multiple roles at a time. Changing a member’s role takes effect immediately.
Table of Contents
On this page